 Previous Page Next Page
Creating cached report data automatically
Cached report data (CRD) is a cached subset of data fetched from the database and is used as a substitute for the database for retrieving data for reports. This provides several benefits.
Cached report data can be created for data resources including queries, stored procedures, imported SQLs, user defined data sources, hierarchical data sources, and parameters whose type is Bind with Single Column or Bind with Cascading Columns.
Administrators can either make cached report data created automatically (auto CRD) or schedule to have a cached data result created for a data resource and updated at a specific time or periodically (scheduled CRD).
Cached report data cannot be generated automatically by default. Administrators can enable the generation of auto CRD and configure the maximum hard disk space for auto CRD and how long an auto CRD can be kept.
To enable creating cached report data automatically:
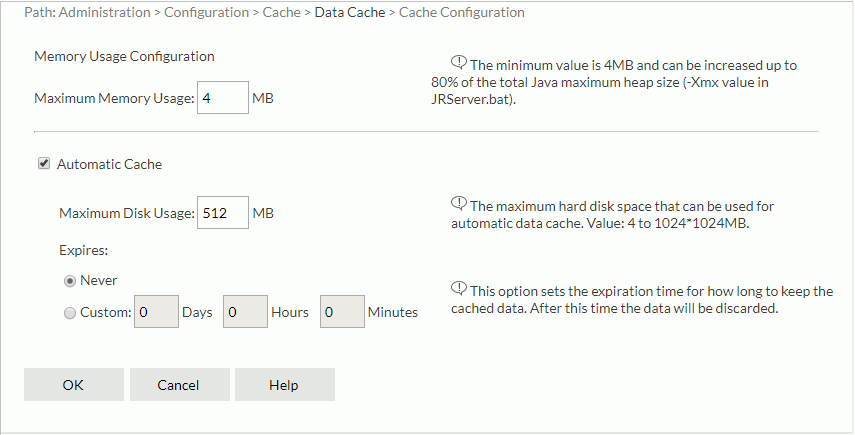
All CRD (both auto CRD and scheduled CRD) share the same memory space. If possible, set the maximum memory usage to a number that the memory can tolerate, for example, 1024 MB or bigger. The cache is used to improve performance when multiple users are running reports using the same CRD. Any size CRD can be accessed with even the smallest cache size. The larger the cache size the faster performance will be for concurrent users, but a large cache size may lower performance for users who do not use the CRD.
When automatic cache is enabled, while running a report, if there is no scheduled CRD created for the data resource that the report is using directly or indirectly (for example, the report is created based on a business view and the business view is built from a data resource), data will be fetched from the data resource, and at the same time the fetched data is cached and becomes an auto CRD.
When there are auto CRD generated for a data resource, the report running request based on the data resource will first search for the auto CRD that contains all the data required by the report. If an auto CRD is located, JReport will retrieve data from the CRD to run the report; if no applicable auto CRD can be found, data is fetched from the DBMS and cached to be another auto CRD.
Auto CRD are only available within one server running life cycle, which means that once the server shuts down or restarts, they will be removed and a new cycle of auto CRD generation begins.
Administrators can schedule to have a cached data result (scheduled CRD) created for a data resource and updated at a specific time or periodically. This is especially useful for month and quarter end reports where multiple reports use the same dataset with the same parameters such as begin and end date.
Scheduled CRD can be generated via JReport's scheduling mechanism. In one scheduled CRD task, more than one data resource can be added, then a cached data result will be created for each data resource by applying the same creation and updating policy.
A data resource can have only one scheduled CRD. When a data resource contains parameters, its scheduled CRD can only represent the data of one parameter scenario.
To create a schedule task to generate cached report data at specified time condition:

 next to the Select a Folder text field. In the Select Folder dialog, browse to the folder containing the required catalog and click OK.
 beside the Select Queries box. In the Select Queries dialog, select the data resources for which you want to create data cache. Then click OK.
To remove a data resource from the box, select it and click  .
.

Specify the DB user and password with which to connect to the data source. You can either use the default ones defined in the catalog or specify another DB user and password.
Check the Add TaskListener to be Invoked option to call a Java application before/after the task runs so as to obtain information about the task (for details, see Applying TaskListener).
If you are in a cluster environment, you can also directly specify an active server in the cluster to perform the schedule task via the Specify a preferred server to run the task option.
If you want to enable task recovery, check Enable Auto Recover Task, then specify the maximum number of times in which to retry running the task in order to recover it, the time interval between the retries, and whether to recreate all or just the failed results.

Next specify when the task will expire:

From the Select a trigger to bind drop-down list, select the required trigger or click the New Trigger button to create a new trigger in the New Trigger dialog (the button is not available to organization admins), then specify the trigger logic with time condition.
Note: When this logic is selected:

When a scheduled CRD is ready for use, all reports based on the same data resource as the CRD will automatically use the CRD for retrieving data. Since a scheduled CRD freezes parameters in the data resource, if a report uses a scheduled CRD and its data resource contains parameters, when running the report, only parameters used in the report are available for specifying values and the data resource parameters will be disabled for editing. In JReport, a parameter may depend on another parameter; if the latter is frozen, the former will be frozen as well.
If the data resource used for creating a scheduled CRD is updated due to catalog republishing, the scheduled CRD will behave as follows:
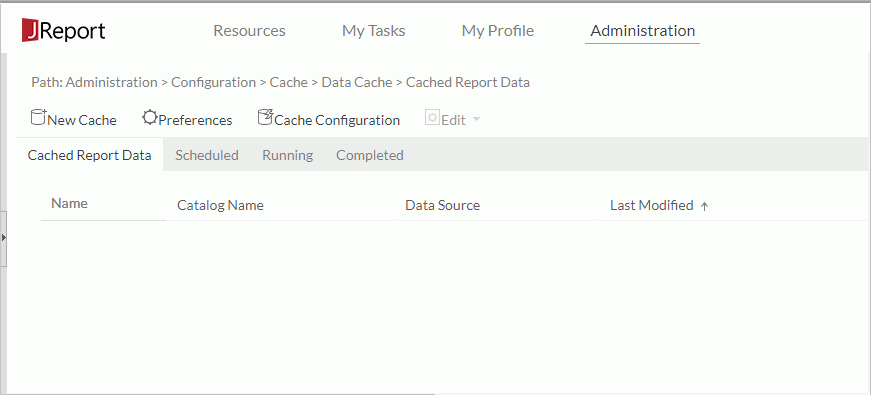
The tasks that have been submitted for generating scheduled CRD are listed in the Cached Report Data, Scheduled, Running, and Completed tables in the Data Cache page according to their status.
The following lists the columns each table contains in details.
This table displays the scheduled data cache tasks and consists of the following columns:
| Column | Description |
|---|---|
| Name | The name of the scheduled data cache. |
| Path | The path of the scheduled data cache in the server resource tree. |
| Catalog Name | The catalog that the scheduled data cache belongs to. |
| Data Source | The data source that the scheduled data cache belongs to. |
| Data Type | The type of the query resource that the scheduled data cache is based on. |
| Last Modified | The last time when the scheduled data cache was modified. |
You can further edit the scheduling information of the tasks in the table or remove the tasks.
This table displays the data cache tasks that are waiting to be performed. It consists of the following columns:
| Column | Description |
|---|---|
| Name | The name of the scheduled data cache. |
| Path | The path of the scheduled data cache in the server resource tree. |
| Catalog Name | The catalog that the scheduled data cache belongs to. |
| Data Source | The data source that the scheduled data cache belongs to. |
| Data Type | The type of the query resource that the scheduled data cache is based on. |
| Last Modified | The latest time when the task was modified. |
| Next Run Time | The next scheduled time this task is to be performed. |
| Last Run Time | The last scheduled time this task was performed. |
| Is Successful | Shows whether or not the last running of this task was successfully performed. The value true means that the last running was performed successfully and false means the task failed. If the column is empty, the task has not been run before. |
This table displays the data cache tasks that are currently being performed. It consists of the following columns:
| Column | Description |
|---|---|
| Name | The name of the scheduled data cache. |
| Path | The path of the scheduled data cache in the server resource tree. |
| Catalog Name | The catalog that the scheduled data cache belongs to. |
| Data Source | The data source that the scheduled data cache belongs to. |
| Data Type | The type of the query resource that the scheduled data cache is based on. |
| Start Time | The time when this task was started. |
| Parameters | The parameters of the query. |
This table displays the data cache tasks that have already been finished and consists of the following columns.
| Column | Description |
|---|---|
| Name | The name of the scheduled data cache. |
| Path | The path of the scheduled data cache in the server resource tree. |
| Catalog Name | The catalog that the scheduled data cache belongs to. |
| Data Source | The data source that the scheduled data cache belongs to. |
| Data Type | The type of the query resource that the scheduled data cache is based on. |
| Is Successful | Shows whether this task was successfully performed. The value true means that the task was performed successfully and false that the task failed. |
| Completed Time | The time when this task was completed. |
| Parameters | The parameters of the query. |
When a task is listed in the table, the cached report data generated from the schedule task will be ready for use.
You can remove the record of a completed CRD task from the table if required. To do this, select the row where the record is located and then click Delete on the task bar, or right-click on the row and select Delete from the shortcut menu.
Tips: