 Previous Page Next Page
Publishing and Downloading Resources
Publishing resources locally
Publishing resources remotely
Publishing reports
Publishing additional resources
Downloading reports
Downloading customized controls
JReport Designer, as a report design tool, allows you to publish your resources from it to your local computer or to JReport Server. When you publish a resource such as a report template, all of the referenced report templates and additional resources such as images will also be published although they will not be visible. This ensures that images and linked reports will be available at runtime.
Reports created on JReport Sever can also be downloaded to a specified folder on your local computer, and further modified in JReport Designer.
Publishing resources locally
JReport Designer supports publishing resources locally. That is, publishing resources to any directory on your computer or across your intranet.
- Click File > Publish > Publish to Local Directory. The Publish to Local Directory dialog appears.
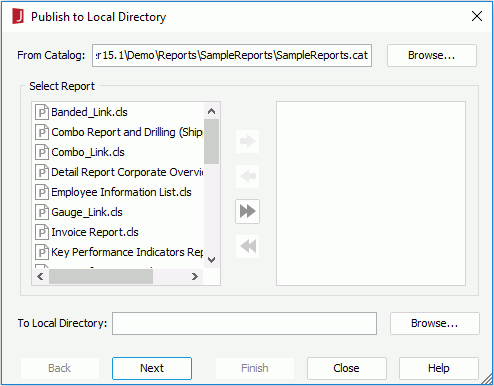
- Click the Browse button to select a catalog, or type the catalog name with its full path directly into the From Catalog text box, and then press Enter to specify the catalog. All the reports in the specified catalog will then be displayed in the Select Report box.
- Select the reports that you want to publish from the Select Report box and click the arrow button to add them to the box on the right, or directly drag the reports you want to publish from the Select Report box to the box on the right. If no report is selected here, only the catalog will be published.
- Specify a directory for the catalog and reports that are to be published.
Click the Browse button to the right of the To Local Directory text box, and locate a directory in the Get Directory dialog. Or you can type a directory in the text box directly. If you type in a directory which does not exist, JReport Designer will automatically create it for you.
- Click Next to view or modify properties of the data source connection.
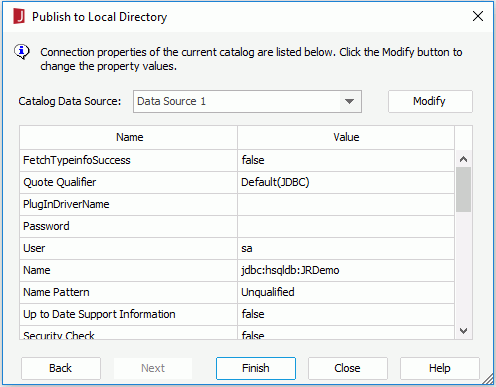
First, select a data source from the Catalog Data Source drop-down list, and then the connection properties of the selected data source will be displayed. If the selected data source is built on a JDBC connection, you can click the Modify button to modify properties of the data source connection in the Get JDBC Connection Information dialog.
- Click the Finish button to publish the catalog and reports.
Publishing resources remotely
The following introduces how to publish different resources to JReport Server, which include reports and additional resources.
If the resource you publish to on the server is already a real path resource you will get a permission denied error since real path resources can only be published by copying the files physically using FTP or OS copy file utilities.
Make sure that JReport Server is started before publishing resources.
Publishing reports
When publishing reports to JReport Server you are actually copying the files into a subfolder in the <install_root>/history folder. The JReport Server database keeps track of physical disk locations and maps those to logical folders shown in the server resource tree.
- In JReport Designer:
- Click File > Publish > Publish Report to Server if you want to publish reports.
- Click File > Publish > Publish Component to Server if you want to publish library components.
The Connect to JReport Server dialog appears.

- Type in the host and port of the remote JReport Server in the Host and Port text boxes.
- When using a standalone server, enter /jrserver in the Servlet Path text box or the context root of your web application if deployed as a war or ear file such as /jreport/jrserver.
- If the server has been integrated with another web server that supports SSL, select the SSL (Security Socket Layer) checkbox to create an SSL connection.
- Check Remember connection information to enable JReport Designer to remember the connection information.
- Provide the user name and password of the server. When the Organization feature is enabled and when the user is an organization user, User Name should include the organization name. Use \ to separate the organization name and the user name, for example, org1\user1.
- Click Connect. The Publish to JReport Server dialog appears.
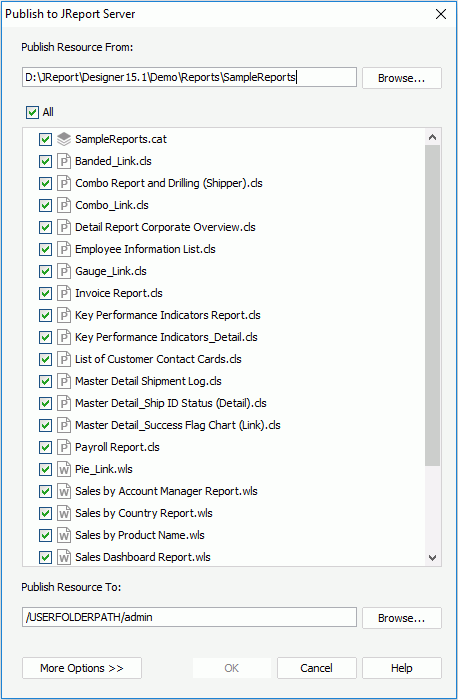
- Click the Browse button next to the Publish Resource From text box to find the directory where your resources are located, and the resources in the specified directory will be loaded automatically. If you choose to type in the directory in the text box directly, you need to press Enter on the keyboard to load the resources in that directory.
- In the resource tree box, check the checkboxes in front of the resources that you want to publish. To publish all the resources in the specified directory, check Select All.
- In the Publish Resource To text box, click the Browse button to specify the folder in the server resource tree where the resources are to be published.
- Select a to-be-published resource in the resource tree box and then click the More Options button to set properties for the resource.
- In the Properties tab,
- In the Resource Node Name text box, specify a name to be displayed in the server resource tree for the resource. You can type a name in the text box or use the Browse button to select a resource name from the Select Resource Name dialog, where all resource names of the same type as the selected resource, which are contained in the Publish Resource To path, are displayed.
- In the Resource Description text box, type a brief description to describe the resource.
- If a report is selected, specify the status of the report by selecting the required item from the Status drop-down list:
- Active
The report can be run, advanced run and scheduled on JReport Server.
- Inactive
The report cannot be run, advanced run or scheduled on JReport Server.
- Incomplete
The report is not completely designed and cannot be run, advanced run or scheduled on JReport Server.
- If a folder is selected, type a local disk path in the Resource Real Path text box as the real path of the folder. If you would like to map the real path resources into the new node created for the folder in the server resource tree so that the server will always be able to get the resources and updates from the real path, check the option Enable Resources from Real Paths. However once you create a real path folder you can no longer publish reports to it from JReport Designer. You need to physically copy the files you want to publish into the specified folder on the server.
- In the Custom Field box, specify custom field values for the resource if there are custom fields enabled on JReport Server.
- Check Apply Archive Policy to apply an archive policy to the resource.
- To use multiple versions for the selected resource, check Archive as New Version, then in the Max Number of Versions text box enter the maximum number of versions that will be listed in the version table of the selected resource. The default value is 0, which means that the version amount is unlimited.
- To replace the old version when the new version is generated, check Replace Old Version.
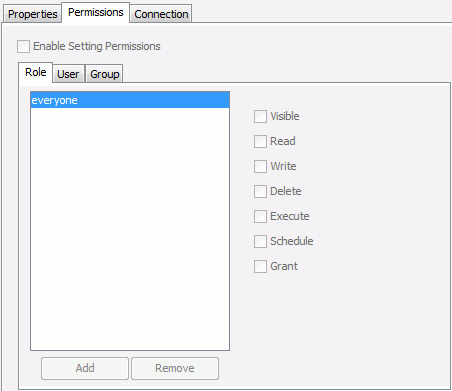
- In the Permissions tab, check the Enable Setting Permissions option to specify permissions for the selected resource (this tab is available only when you have specified to publish the resources to a public folder on the server). For detailed information about the permissions, see Managing Permissions in the JReport Server User's Guide.
The roles, users, and groups that are created in the JReport Server security system are listed in the Role, User and Group boxes. From one box, select a principal then check the checkboxes ahead of the required permissions. You can remove the principals in any box by selecting it and clicking the Remove button. To add the deleted principal back, use the Add button.
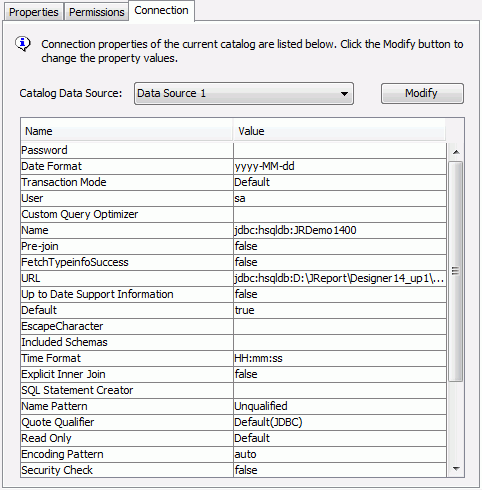
- If the selected resource is a catalog, the Connection tab is activated. Select a data source from the Catalog Data Source drop-down list and the connection properties of the selected data source are displayed. If the data source contains multiple connections only properties of the first connection are listed. When the connection is a JDBC connections the Modify button is activated. You can click it to modify properties of the JDBC connection in the Get JDBC Connection Information dialog. This is very useful when the database you use for report development is different from the one you use for production reports. Another alternative is to override the details of the connection by using the datasource.xml file in JReport Server.
- Repeat steps 11 - 13 to set properties for other resources as required.
- Click OK to publish the resources. If the reports or library components use special fonts, style groups, geographic information, or customized control files, the Publish Additional Resources dialog appears for you to specify them.
Notes:
- Only one catalog file is allowed in folders in the server resource tree where library components can be published.
- The Enable Resources from Real Paths option can only be checked when the same option on the JReport Server console > Administration > Configuration > Advanced page has also been checked.
- If you have made some changes to the to-be-published resources, but haven't saved them, before publishing starts, JReport will save the changes automatically to ensure the resources published to the server are the latest.
- After resources have been published to JReport Server, you may find that the publish time shown on the server UI is different from the client time. That is because the publish time takes the server time instead of the client time.
Publishing additional resources
Additional resources used by reports can also be published to JReport Server. These resources include special fonts, geographic information, style groups, and customized control files.
- Click File > Publish > Publish Other Files to Server.
- In the Connect to JReport Server dialog, specify the information to connect to a started JReport Server. The Publish Additional Resources dialog is displayed.
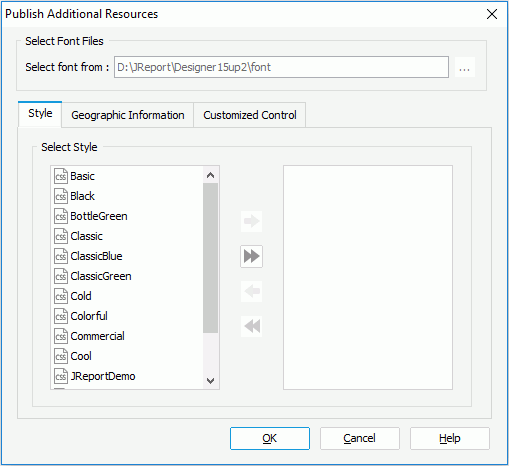
- If special fonts are available, click the Browse button to specify the folder containing the special fonts.
- In the Style tab, select the style groups you need and then click the right-headed single arrow button to add them to the right box.
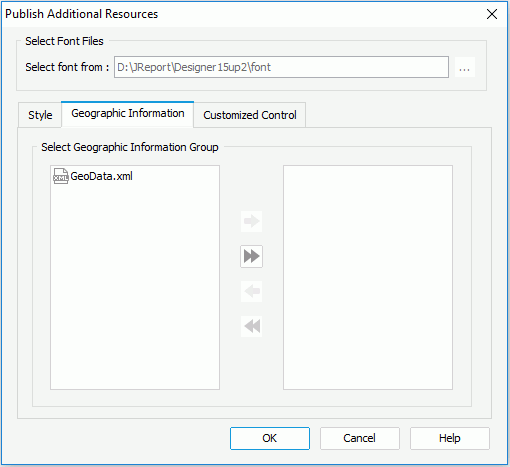
- In the Geographic Information tab, select the desired xml file where geographic information is stored and click the right-headed single arrow button to add them to the right box.
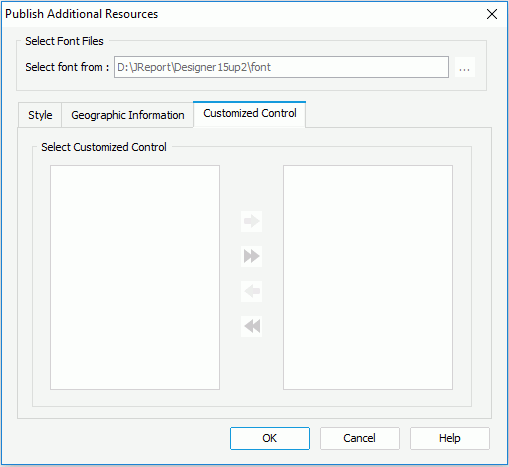
- In the Customized Control tab, select the customized control files you need and click the right-headed single arrow button to add them to the right box.
- Click OK to publish the resources.
Downloading reports
Reports created on JReport Server can be downloaded to your local computer and further modified using JReport Designer. The same as with publishing, all resources used by the reports will also be downloaded such as other linked reports and images.
- In JReport Designer:
- Click File > Download > Download Report from Server if you want to download reports.
- Click File > Download > Download Component from Server if you want to download library components.
The Connect to JReport Server dialog appears.

- Type in the host and port of the remote JReport Server in the Host and Port text boxes.
- When using a standalone server, enter /jrserver in the Servlet Path text box or the context root of your web application if deployed as a war or ear fie such as /jreport/jrserver.
- If the server has been integrated with another web server that supports SSL, select the SSL (Security Socket Layer) checkbox to create an SSL connection.
- Check Remember connection information to enable JReport Designer to remember the connection information.
- Provide the user name and password of the server. When the Organization feature is enabled and when the user is an organization user, User Name should include the organization name. Use \ to separate the organization name and the user name, for example, org1\user1.
- Click Connect. The Download from JReport Server dialog appears.
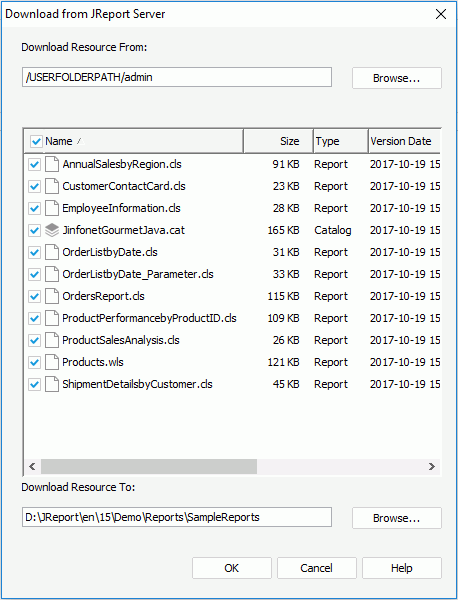
- In the Download Resource From text box, click the Browse button to specify the folder on the server where to download resources. The resources in the specified folder will then be loaded automatically in the resource tree box.
- In the resource tree box, check the checkboxes in front of the resources that you want to download.
- Click the Browse button next to the Download Resource To text box to specify the path to which resources will be downloaded, or type in the directory in the text box directly.
- Click OK. The selected resources and all additional resources referenced by them such as linked reports and images will then be downloaded from JReport Server.
When the resources are successfully downloaded from JReport Server, you can open them in JReport Designer, and further edit them if required.
Notes:
- Resources in the Public Reports folder of JReport Server are protected by permissions. If you specify to download resources from that folder, which resources you can see in the resource tree box and which resources you can download are determined by the user name with which you use to connect to the server. You can only view the resources on which you have the Visible permission in this box and download resources on which you are assigned the Read permission. For more information, refer to Managing Permissions in the JReport Server User's Guide.
- Downloading reports which use business views as data source from JReport Server requires that JReport Designer and JReport Server each has its own Live license.
Downloading customized controls
Customized controls on JReport Server can be downloaded to your local computer and further modified using JReport Designer.
- Click File > Download > Download Customized Control from Server.
- In the Connect to JReport Server dialog, specify the information to connect to a started JReport Server. The Download Customized Control dialog is displayed.
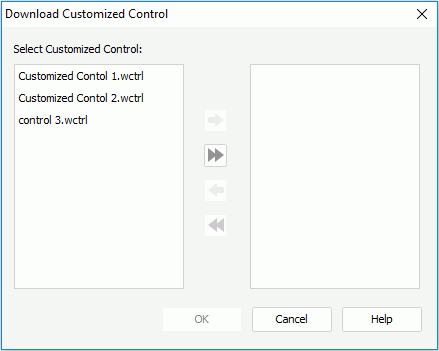
- Select the customized control files you need, click the right-headed single arrow button to add them to the right box, and then click OK.
Note that the downloaded files will overwrite the local ones with the same name directly without warning.
 Previous Page Next Page
 Previous Page Next Page


