- Open the report that you want to export.
- Click File > Export > To HTML. The Web Wizard appears.

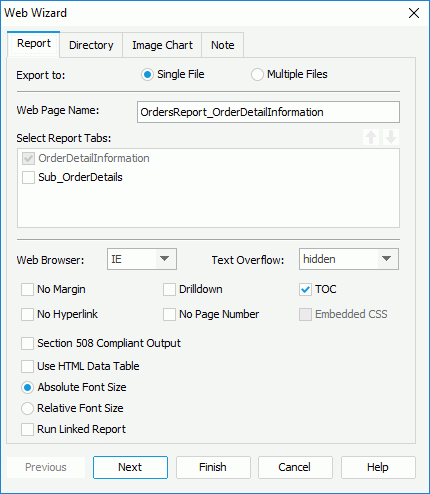
- In the Report tab, specify whether to export the report result to a single HTML file or multiple HTML files.
- By default the name of the report is used as the name of the exported HTML file. You can specify another name for the HTML file in the Web Page Name text box if you want.
If you select to export the report result to multiple files, JReport will designate a serial number for each HTML file. For example, if you name a 3-page report as "sales", JReport will create three files called sales_1.html, sales_2.html, and sales_3.html.
- If you are exporting a page report, in the Select Report Tabs box, select the report tabs in the page report you want to export. The selected report tabs will be exported in the list order. You can click
 or
or  to change the order of the report tabs.
- From the Web Browser drop-down list, select the web browser the HTML result adapts.
- Specify whether the text overflow is visible or hidden. If hidden the overflowed text will be cut in the HTML result.
- Check the No Margin checkbox to remove the margins in the HTML result, which are set at report design time.
- If you are exporting a page report created using query resources, when the report contains grouped banded objects and summaries are added to the groups, you can check Drilldown to generate the drilldown files for the summary of each group, so that when you view the exported HTML file, you can drill down on a summary to get the details about the corresponding group the same as you do when previewing the report in JReport format. However you should make sure that the summaries are not hidden or suppressed; otherwise you will not be able to get drilldown files.
- By default the Table of Contents is included in the exported HTML file, using which you can easily locate the report objects in the HTML file (to make a report object shown in the TOC, you need to make sure its TOC Anchor property is true). If you do not want the TOC in the exported HTML file, uncheck TOC.
- If you select to export the report result to a single file, by default there will be a navigation bar on each page of the exported HTML file for you to navigate to the previous and next page of the report result, and the page number information showing the current page number and total page number is also displayed on the navigation bar. If you want to remove the navigation links and page number, check No Hyperlink and No Page Number. When the navigation links and page number are to be shown, you can localize them to your preferred language in advance.
If you select to export the report result to multiple files, check Embedded CSS if you want to embed the cascading style sheet (CSS) in the exported HTML files; otherwise the .css file will be generated individually.
- Specify whether to generate the report result using a relative font size or absolute font size. When relative font size is used, the font size can be adjusted according to the font size settings in the web browser.
- Check Run Linked Report if you want to include the reports that is linked with the report (not including the detail reports) in the HTML result. If you are only interested in the primary report, leave this option unchecked. Generating linked reports at the same time, especially when the linked reports contain a large amount of data, will cause performance issue.
- Check Section 508 Compliant Output to export the report to the HTML result which is Section 508 compliant if necessary. See Accessibility for more information.
When Section 508 Compliant Output is checked, the Use HTML Data Table and Relative Font Size options will be checked and disabled. The output will be Section 508 compliant including HTML data table, accessible attributes, and relative font feature.
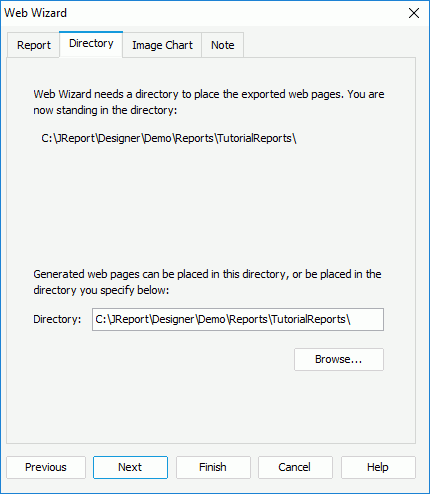
- In the Directory tab, click Browse to specify the directory where the exported HTML file will be saved. You can also input the location in the Directory text box manually.

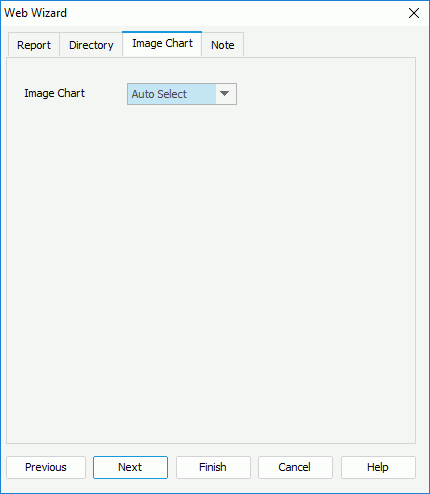
- If the report contains charts, the charts will be converted to images in the exported HTML result. You can specify in which image format to convert the charts in the Image Chart tab.

- Auto Select
If selected, the image format will be set to JPG or GIF by the JReport system automatically. If the image colors are less than 256 colors, GIF will be applied; otherwise, it is JPG.
- GIF
If selected, the GIF format will be applied, which is a lossless compression technique and supports only 256 colors. GIF is better than JPG for images with only a few distinct colors, such as line drawings, black and white images and small text that is only a few pixels high.
- JPG (JPEG)
If selected, the JPG (JPEG) format will be applied, which is supported on the Web. JPG is a lossy compression technique that is designed to compress color and grayscale continuous-tone images. JPG images support 16 million colors and are best suited for photographs and complex graphics. The transparency property of the charts takes effect only in PNG format.
- PNG
If selected, the PNG format will be applied, which provides a portable, legally unencumbered, well-compressed (effectively 100 percent lossless compression), well-specified standard for lossless bitmapped image file. PNG supports indexed-color images of up to 256 colors and shows a more interchangeable, flexible and robust function than GIF.
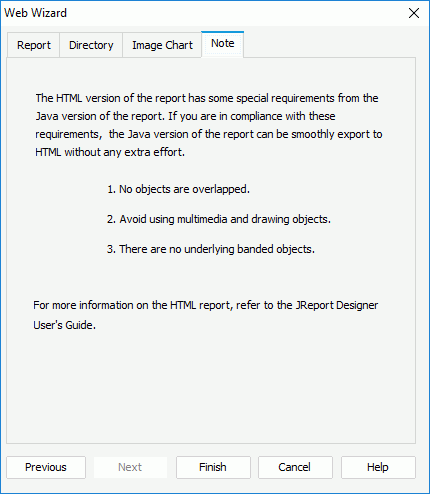
- The Note tab includes important information about exporting to HTML. You are recommended to read the contents before you export your report to HTML format. Note that multimedia objects and drawing objects (except for straight lines and boxes) cannot be exported to HTML.

- Click Finish to generate the HTML file.
 Previous Page Next Page

 or
or  to change the order of the report tabs.

