 Previous Page Next Page
For any geographic map in a report, you can further modify it at any time. For example you can change and filter the data displayed in the geographic map, apply conditional formats on the map markers to highlight important values.
Once a geographic map has been created, you can further modify it by accessing its shortcut menu wizard which is composed by a set of screens that are similar to the wizard screens used to create the geographic map. For example, you can change the data source the geographic map uses, edit the data displayed on the map and so on.
For a geographic map in a page report, edit the group settings, layout mode and marker properties in the Group, Layout and Marker screens respectively.
For more detailed information about defining a geographic map, refer to Inserting Geographic Maps in a Report.
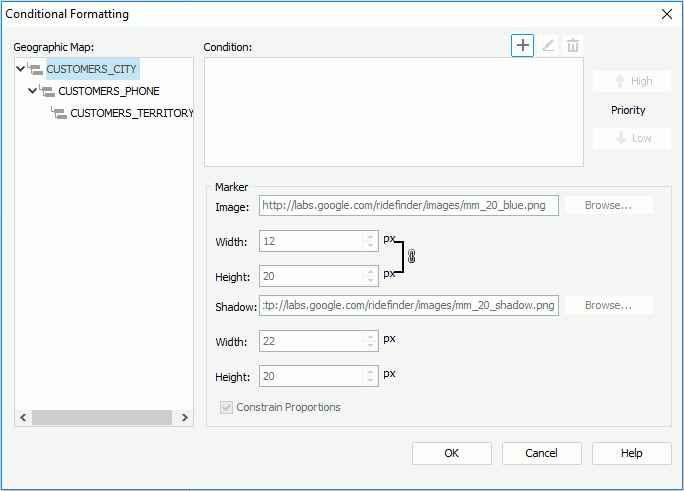
After a geographic map is created, each value in a group is bound with a marker. You can add conditional formats to the markers, then when a specified condition is fulfilled, the format bound with the condition will be applied to the markers automatically. This is very useful to highlight values that might need to be acted on by the end user.
However, for geographic maps in web reports and library components, the conditional formats are applied based on the advanced settings of the Shape By option, in other words, when the marker shape is controlled by image. If you apply conditional formats to a geographic map the shape of which is controlled by field or shape, the field or shape that you specified to the Shape By option will be ignored after the conditional formats take effect.
To add conditional formats to the markers in a geographic map:
 .
.The Conditional Formatting dialog appears.
 above the Condition box. The Edit Conditions dialog appears.
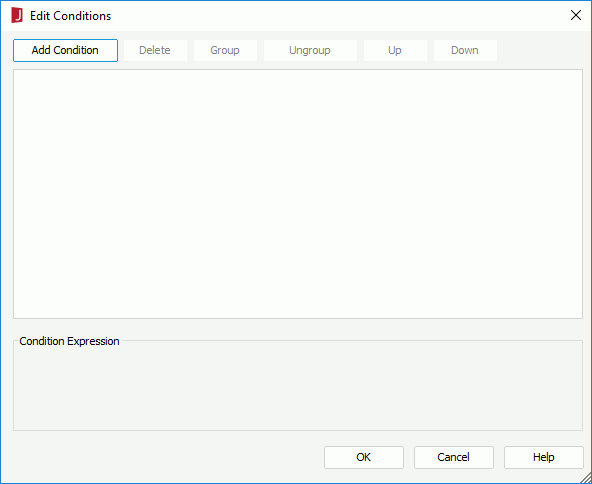
To make some condition lines grouped, select them and click the Group button, then the selected condition lines will be added in one group and work as one line of filter expression. Conditions and groups together can be further grouped. To take any condition or group in a group out, select it and click Ungroup.
To adjust the priority of the condition lines, select it and click the Up or Down button.
To delete a condition line, select it and click the Delete button.
The newly added condition is then displayed in the Condition box of the Conditional Formatting dialog.
To edit a condition, select the condition from the Condition box, click  , then edit the condition in the Edit Conditions dialog.
To adjust the priority of the conditions, select a condition and click the High or Low button.
To remove a condition and the corresponding marker properties, select the condition from the Condition box and then click  .
.